
Les ourlets sont la dernière touche portée à un vêtement ou à un accessoire. J'aime beaucoup faire les ourlets à la main, car c'est la seule manière de les faire invisibles et ils sont la plupart du temps plus jolis que les ourlets faits à la machine. Le seul souci, à mes yeux, c'est qu'ils sont aussi plus fragiles que les ourlets cousus à la machine. Mais comment choisir le bon point en fonction du tissu et de l'objet cousu?
Vous trouverez dans ce billet une liste de 5 points différents pour faire des ourlets à la mains, avec leurs avantages et leurs inconvénients. Vous pourrez vous y référer à chaque fois que vous devez coudre un ourlet à la main (et pour chaque ourlet, un lien renvoie vers un tutoriel)
Tableau comparatif des ourlets à la main
Description de chaque point pour coudre un ourlet à la main
Le point glissé
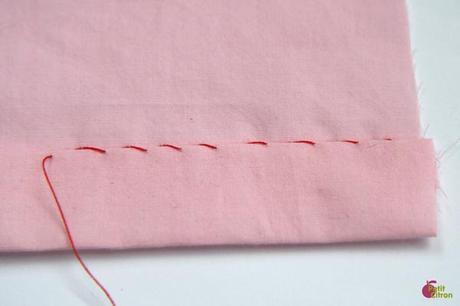
vue de l'envers
C'est un point totalement invisible qui permet de faire des ourlets sans qu'on voit le fil, ni dessus, ni dessous puisqu'on ne prend qu'un fil du tissu. On l'appelle aussi point coulé.
Retrouvez le tutoriel en suivant ce lien!
Le point de chausson (ou point croisé)
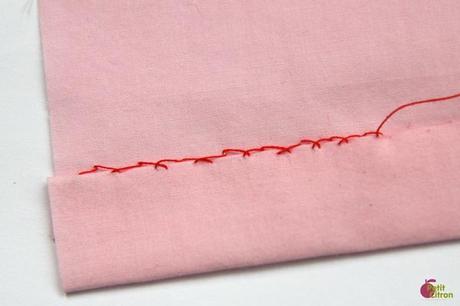
vue de l'envers
Ce point sert également à maintenir en place (on dit " baguer ") les ourlets ainsi qu'à réunir deux bords à plat. Il peut maintenir un bord de tissu qui s'effiloche sur un autre tissu. Il faut faire attention à ne prendre qu'un fil du tissu, et à ne pas serrer le fil.Retrouvez le tutoriel en suivant ce lien!
Felling or vertical hemming stitch
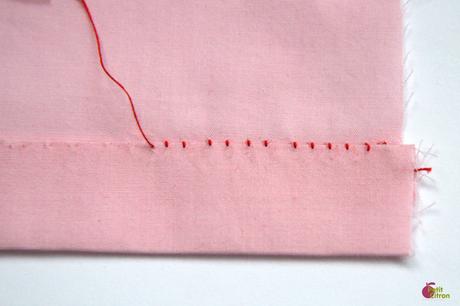
vue de l'envers
1. Thread the needle with a single thread and tie a knot at one end. Insert the needle into the fold between layers and come up through the fold. Make sure the knot anchors the thread.
2. Grab a tiny bit of the garment fabric with your needle. Moving 1/4″-1/2″ grab a tiny bit of the folded hem. Instead of moving grab a tiny bit of the garment fabric right above the stitch. Moving another 1/4″-1/2″ grab a tiny bit of the folded hem. Repeat all the way around the hem.
Le point caché : le point d'ourlet de couturière
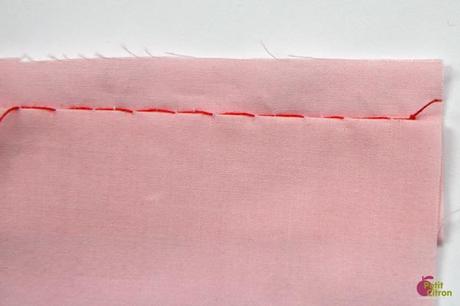
vue de l'envers, l'ourlet n'étant pas encore rabattu
1. Fold the garment fabric so that about 1/4″ of the hem allowance is showing. The inside of the garment should be facing you with the 1/4″ of the hem allowance up.
2. Thread the needle with a single thread and tie a knot at one end. Insert the needle into the hem allowance. Make sure the knot anchors the thread.
3. Grab a tiny bit of the fold with your needle. Moving 1/4″-1/2″ grab a tiny bit of the hem allowance. Moving another 1/4″-1/2″ grab a tiny bit of the fold. Repeat all the way around the hem.
Le point caché arrière
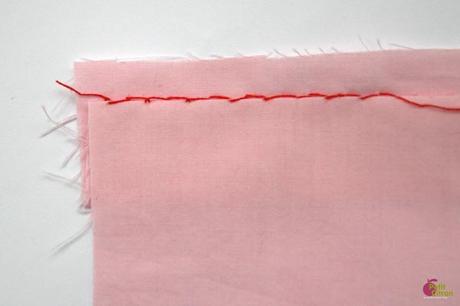
vue de l'envers, l'ourlet n'étant pas encore rabattu
1. Fold the garment fabric so that about 1/4″ of the hem allowance is showing. The inside of the garment should be facing you with the 1/4″ of the hem allowance up.
2. Thread the needle with a single thread and tie a knot at one end. Insert the needle into the hem allowance. Make sure the knot anchors the thread.
3. Grab a tiny bit of the fold with your needle. Moving (but pointing your needle left) 1/4″-1/2″ grab a tiny bit of the hem allowance. Moving (but pointing your needle left) another 1/4″-1/2″ grab a tiny bit of the fold. Repeat all the way around the hem.
Et vous, avez-vous des astuces pour choisir l'ourlet des vêtements que vous cousez?