Si comme moi vous faite face à ce type de message d'erreur lors de l'installation du SDK android sous Eclipse 3.5 (Galileo) sur Ubuntu 10.10 (32bits), plus particulièrement lors de la partie installation du plugin ADT.
Lorsque vous êtes à l'étape de "Downloading the ADT Plugin", comme décrit sur cette page :
  1. Start Eclipse, then select Help > Install New Software....
  2. Click Add, in the top-right corner.
  3. In the Add Repository dialog that appears, enter "ADT Plugin" for the Name and the following URL for the Location:
     https://dl-ssl.google.com/android/eclipse/
     Note: If you have trouble acquiring the plugin, try using "http" in the Location URL, instead of "https" (https is preferred for security reasons).
     Click OK.
  4. In the Available Software dialog, select the checkbox next to Developer Tools and click Next.
  5. In the next window, you'll see a list of the tools to be downloaded. Click Next.
  6. Read and accept the license agreements, then click Finish.
Et là, lors de l'installation des packages, Eclipse réclame des packages manquants et refuse l'installation :
Cannot complete the install because one or more required items could not be found.
Software being installed: Android Development Tools 0.9.4.v200910220141-17704 (com.android.ide.eclipse.adt.feature.group 0.9.4.v200910220141-17704)
Missing requirement: Android Development Tools 0.9.4.v200910220141-17704 (com.android.ide.eclipse.adt.feature.group 0.9.4.v200910220141-17704) requires 'org.eclipse.wst.sse.core 0.0.0' but it could not be found
La cause est le plugin Google pour Eclipse qui dépend d'autres composants spécifiques d'Eclipse, ici WST. Celà signifie que votre installation d'Eclipse n'a pas encore la totalité des librairies nécessaires, mais on peut facilement les installer en suivant ces instructions :
1. Selectionner Help > Install New Software...
2. Clicker sur le lien "Available Software Sites".
3. Vérifier qu'il y a le site d'update nommé Galileo. S'il n'existe pas, click Add... et entrez l'adresse http://download.eclipse.org/releases/galileo dans la ligne d'edition.
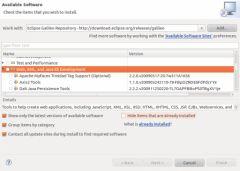
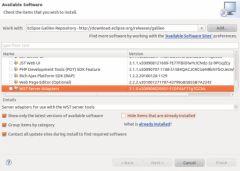
4. Suivre ensuite les étapes d'installation; En sélectionnant en particulier dans la section "Web,XML, and Java EE development" le plugin "WST Server adapter", comme dans les sreenshot ci-dessous.


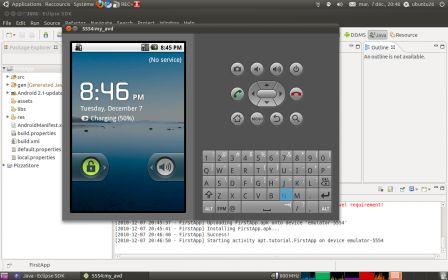
Eclipse devrait charger et installer les plugins manquants pour satisfaire les dépendances, et vous devriez au final être capable de lancer la chaîne de développement Android sous Eclipse.

liens:
FAQ - Google Plugin for Eclipse


LES COMMENTAIRES (1)
posté le 05 janvier à 17:55
Merci bien pour cette astuce ! ;)