Design Intent:
In many manufacturing companies, when the engineering drawings are released for an assembly, the part detail drawings have the quantity marked on them. Most of the time that is done by hand, but sometime the designer inserts the quantity in the drawing as an annotation. Since the part is the child of the assembly, there is apparently no way to link the annotation to a parametric property of the assembly in such a way, that anytime there are modifications to the assembly impacting the said quantity, they will be reflected in the part drawing automatically.
I was asked many times about this problem when I worked in design and, this week, a customer asked the same question. My first impulse was to tell him it is not possible and, moreover, it is not a good idea; what if the part is used in more than one assembly? But at this point, I was intrigued and I started looking for a solution.
The trick consists in the fact that one drawing can contain views from different parts or assemblies. Let’s say you are building different kinds of chairs that use the same knob. Let’s call the part model of the knob: KNOB. This is used in 3 assemblies:
- CHAIR LEATHER - has 5 KNOB parts
- CHAIR MESH - has 3 KNOB part
- CHAIR BUDGET - has 1 KNOB parts
You have these 3 assemblies already built in SolidWorks and now you want to create a drawing of the KNOB showing the quantities needed in each of the 3 assemblies.
Step 1:
Edit each of the 3 assemblies and add a simplified configuration in each of them, called KNOB_ONLY, in which all the other parts are suppressed.
Step 2:
Create a detail drawing of the KNOB and finish all the views, dimensioning, etc.
Step 3:
- Outside the Sheet area, insert a view of the assembly CHAIR LEATHER (in the KNOB_ONLY configuration).
- Select the new view and insert a BOM table. Because all the other parts in the assembly are suppressed, in the BOM you will see only the row for the KNOB part.
- Delete all the columns excepting the QTY.
- Edit the text in the QTY. cell to QTY. in CHAIR LEATHER
- Drag the resulted small BOM wherever you want in the drawing.
Repeat Step 3 for CHAIR MESH and CHAIR HIGHTECH
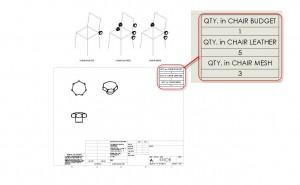
The result looks like so (click to enlarge):

Tips submitted by Alin Vargatu from Javelin Tech (SolidWorks Authorized Reseller in North America).
Thanks Alin for this great tips!
Share and Enjoy:


This post was submitted by Alin Vargatu.

